Creating Normal Maps with Lightwave 3D : Layout
Setup Scene for rendering Maps
In this part of tutorial i
will explain how to create Normal,
Color and Spcular Map with using Surface
Baker.
We steal in modeler!
Save models (File > Save Object)
and send them to Layout.
Lightwave 3D Layout will
be automactly open with your models.
Switch view from Perspective
to Camera View
Select Current Item (Head:Layer1) and
set X position of model to -300mm, then
(Head:Layer2)
X position to 300mm.
Creating Normal Map with Bump Texture
Layer
Im not good in texturing
high polygon UVmaps or with Procedural Textures, so i will use
one of Rock Surface form very
cool site Impact3D.
On this site you can find bunch of high quality Surface Textures.
>>>>
No mater if you using UVmap textures or Procedural Textures, save your Surface befour you continue
working. You will need to delete some texture parts and load them back
again. <<<<
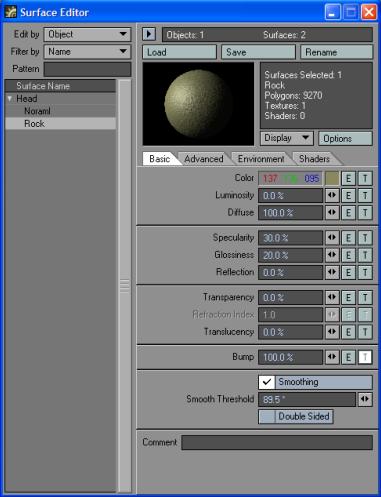
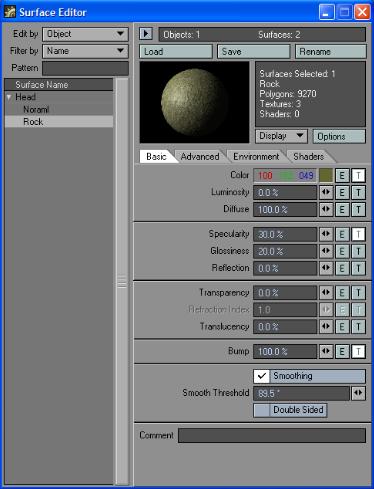
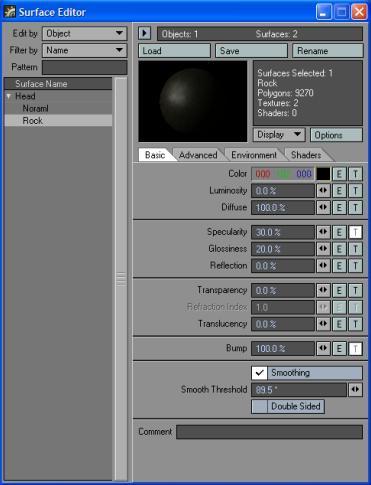
Open Surface Editor (F5) and
select High Polygon Surface
(Rock).
Remove all texture ecept
Bump.
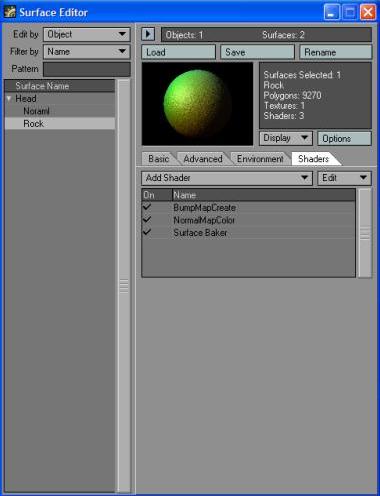
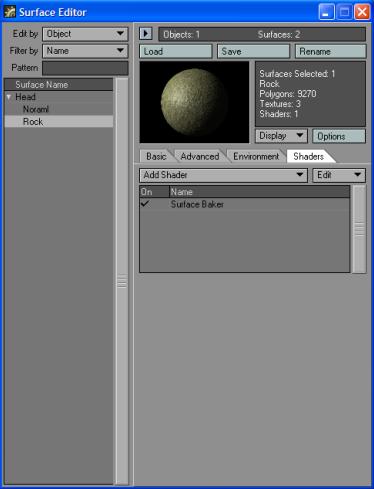
Click on Shaders and add (BumpMapCreate, NormalMapColor)
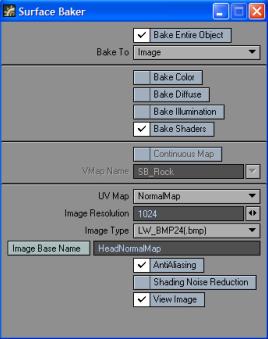
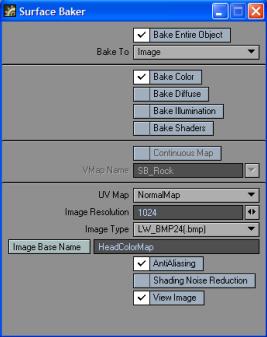
Double click on Surface baker and set those
propertys:
- Check Bake Color, Bake Diffuse and Bake Illumination.
- Check Bake Shaders
and AntiAlasing.
- Set UVmap to High
polygon UVmap (NormalMap), Image
Resolution to 1024, Image Type
to LW_BMP24(.bmp) and Image Base
Name to HeadNormalMap.
Close Surface Baker
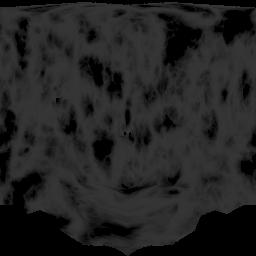
and Surface Editor and hit F9
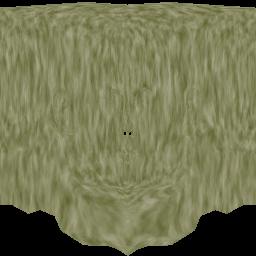
to render Normal Map.
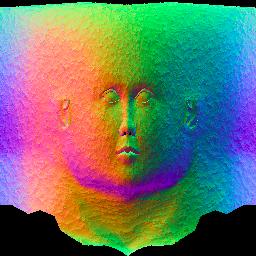
Now we have good looking Normal
Map! Only two more Color
and
Specular.
Creating Color Map
This Map is easiest
to create.
Berfour everything we must load our
Surfaces, so we could have all Textures back.
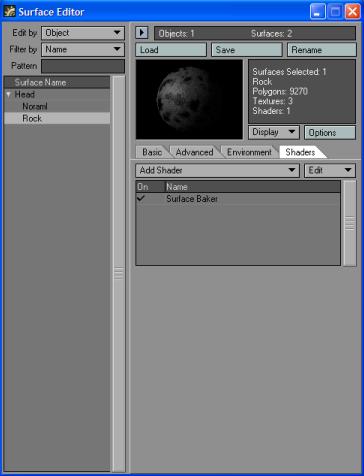
Open Surface Editor (F5) and leave
everything on default.
Click on Shaders and add
Surface Baker.
Double click on Surface
Baker and
set those
propertys:
- Check Bake Diffuse
and Bake Illumination.
- Check AntiAlasing.
- Set UVmap to High
polygon UVmap (NormalMap), Image Resolution to 1024, Image Type to LW_BMP24(.bmp) and Image Base
Name to HeadColorMap.
Close Surface Baker
and Surface Editor and hit F9
to render Color Map.
Only one more!
Creating Specular Map
For this Map we will play with
Color Texture in Texture Editor. Once again we will
load Surfaces.
Open Surface Editor (F5) and
Remove only Color
Texture.
Set Texture Color
to Black.
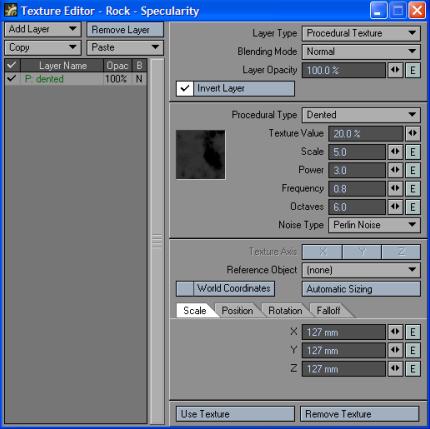
Click on Specularity
Texture and
copy all Layers.
Click on Use Texture.
Click on Color Texture and paste Layers.
Click on Use Texture.
Click on Shaders and
add Surface Baker.
Double
click Surface Baker and set
those
propertys:
- Check Bake Diffuse
and Bake Illumination.
- Check AntiAlasing.
- Set UVmap to High
polygon UVmap (NormalMap), Image Resolution to 1024, Image Type to LW_BMP24(.bmp) and Image Base
Name to HeadSpecularMap.
Close Surface Baker
and Surface Editor and hit F9
to render Specular Map.
Now we have all three
Map: Normal, Color and Specular. Lets do last
render.
Last render
Open Surface
Editor (F5) and select Low
Polygon Surface (Normal)
Click on Color Texture and
set those propertys:
- Set Projection to UV and UVmap to Low Polygon UVmap
(NormalMap).
- Load Image HeadColorMap.bmp.
Click Use Texture.
Click Specular Texture and set those
propertys:
- Set Projection to UV and UVmap to Low Polygon UVmap
(NormalMap).
- Load Image HeadSpecularMap.bmp.
Click Use texture.
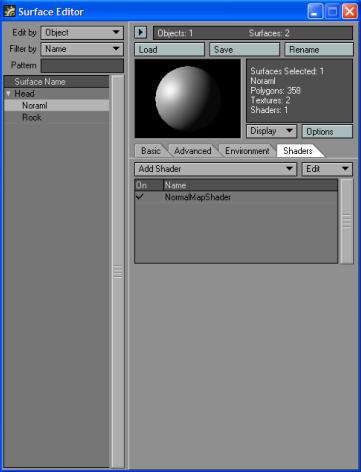
Click on Shaders and add NormalMapShader.
Double Click NormalMapShader
You will notice that is Texture
Editor only with parameters for
NormalMap.
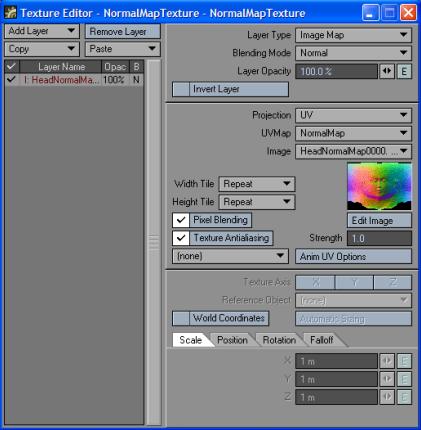
In Texture Editor set those propertys:
- Set Projection to UV and UVmap to Low Polygon UVmap
(NormalMap).
- Load Image HeadNormalMap.bmp.
Close Texture Editor
and Surface Editor.
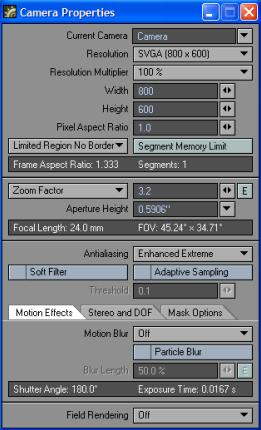
Set Camera (C) Properties
(p)
Resolution to SVGA(800x600) and
Antialiasing to Enhanced Extreme.
Close Camera Properties and press F9 to
render your low polygon model with Normal
Map.
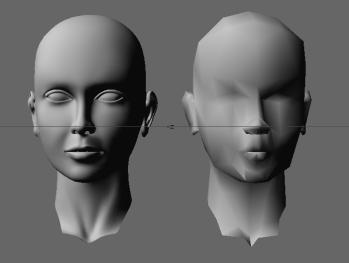
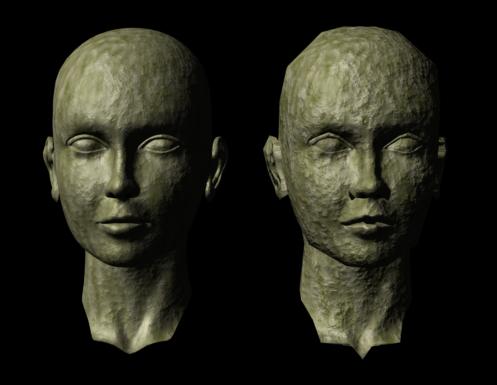 Left
side High polygon model right side low polygon model with Normal Map.
Left
side High polygon model right side low polygon model with Normal Map.
Final render looks good. Bumps are little
to strong and ears part are
not so good but its looks better then with only color map.
If you have any questions, comments,
critics.... about tutorials fell
free to contact me on [email protected]
or post it in my forum.