Creating Normal Maps with Lightwave 3D : Modeler
What is
Normal Map?
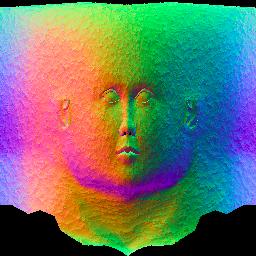
Normal map encodes
X,Y,Z vector information from high polygon model in the channels of an
RGB image. The red channel encodes X (horizontal) vector information,
the green channel encodes Y (vertical) vector information and the blue
channel encodes Z (depth) vector information.
 Normal Map RGB image.
 Model with Normal Map from Serious
Sam 2 game.
Model with Normal Map from Serious
Sam 2 game.
About tutorial
In this tutorial i will show you a easy
way to export Normal, Color and Specular Map from high polygon to
low
polygon model.
I used Lightwave
3D 8.0 for this tutorial
because one of plugin will not work in any versions prior to 7.5. So
this tutorial will only helps users who use Lightwave 3D 7.5, 8.0 or
higher.
Preparing
for tutorial
For this tutorial you need
to download some plugins: Normal
Map plugins and UV
Infector.
In other part of tutorial i will explain those plugins for
now i will only say that they will help us to get best results.
Adding plugins
To use those plugins we must add it in
Lightwave 3D. First extract NormalMaps.zip and
UVInfector0_1_0.zip in to your Lightwave 3D plugin
directory (C:\Program Files\LightWave [8]\Plugins\).
To add plugins go to (Utilities > Plug-ins : Add Plug-ins)
(F11)
Open four plugins (BumpMapCreate.p, NormalMapColor.p, NormalMapShader_80.p and UVInfector.ls) from plugins
directory. TIP:
If you using Lightwave 3D 7.5 open NormalMapShader_75.p.
Why we didn't open NormalMapCreat.p?
Because we don't need him. Why? I will explain it keep reading...
After you open all plugins
click Done to confirm adding
plugins.
Now all added modeler
plugins are in (Utilities >
Plug-ins : Additional) and they are ready to use.
Making high
polygon model UVmap simular to low polygon
If you want good looking
and precise Normal, Color and Specular Map this is only solution.
With NormalMapCreate you can create Normal Map
without high polygon model UVmap,
but you can't create Normal+Bump,
Color or Specular Map. This is why we
didn't load NormalMapCreate.p in
previous steps.
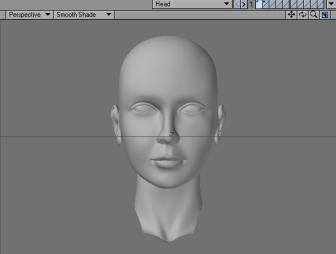
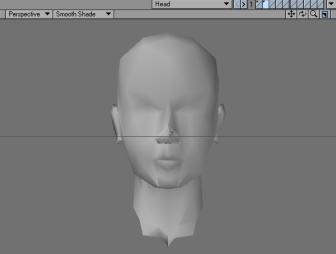
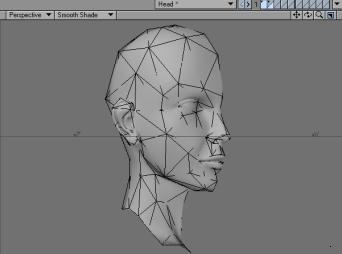
For this tutorial i will use my high and low polygon head
model. High and low polygon models are nesecary to create Normal Map.
Your models must have all this stuff so you could follow this tutorial
better:
- Models must be with
different Surface Names.
- Models must be in
different Layers.
- Low polygon model must
have UVmap.
If you didn't made low polygon model, I will give you some
links to awesome tutorials and plugins which will help you.
To reduce polygons from
high polygon model use gemLOSS3
plugin. Its very simple and
gives best result, if you need
some tutorials heres a link.
When gemLOSS3 finish his job
you need UVmap, best tutorial
for that is
Joe Lertola's UV
mapping complex object tutorial.
Now lets back on track and make that UVmap!
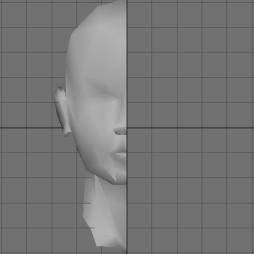
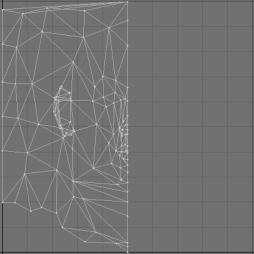
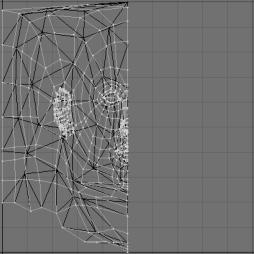
Cut on half high and low polygon
head.
You will notice that low polygon model map is ether cuted on half.
Select high polygon head in Foregrand
Layer and low polygon to
Background Layer.
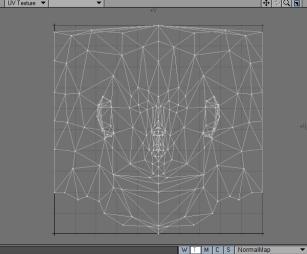
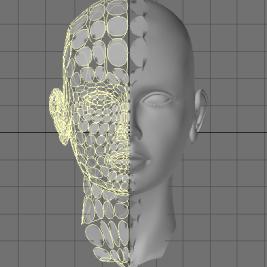
Use UVInfector (Utilities >
Plug-ins > Additional : UVInfector) and wait that finish his
job.
UVInfector
will align UV's to those on a background layer.
 Pretty cool!
High polygon
and low polygons head are cat on half. We must back them to normal.
First we will fix high polygons head.
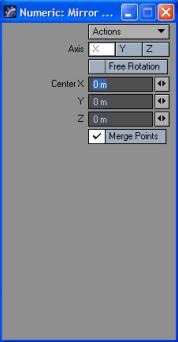
Select all polygons and Duplicate
(Mirror Multiply > Duplicate :
Mirror) (Shift + v) and
Set Axis : X
Now we duplicate left part of head to right. But UVmap is same as
befour? This is because Mirror
tool not effect UVmap, so we
need to do it on some other way.
Unweld selected part (Detail -> Points : Unweld) (Ctr + v)
Looks unnessecary but we must do it to Unweld
UVpoints and unattach that part
from
other.
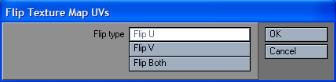
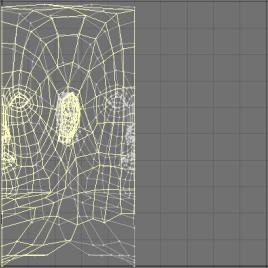
Use Flip UVs (Map > Texture : Flip
UVs) and set flip type: Flip U
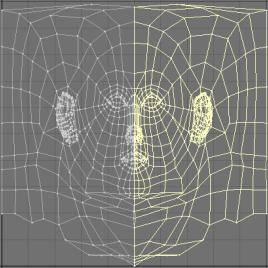
Move flipped head (Modify >
Translate : Move) (t) to center of UVmap
If we didn't used Unweld tool
we couldn't move other part without
deforming UVmap.
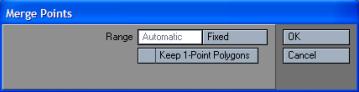
Select all polygons and then Merge
points (Detail > Points : Merge
Points) (m) and uncheck Keep 1 - Point Polygons.
Now use previous steps to fix low polygon head UVmap.